A micro-frontends architecture is a design approach in which a web application is broken down in individual, semi-independent micro parts that work together. This architecture can be as open as you wish, and each application can be implemented using different frameworks. The micro-frontend concept is widely inspired by microservices.
As for micro-frontends, it is important to note that even when an application is divided into several projects, each one of them will be integrated into a single one. Thus, for the final user, everything would seem to be a unique application, instead of many of them.
Although micro-frontends have started to receive lots of attention lately, there is not a single way of implementing them. In fact, there are a variety of approaches, depending on the objectives and requirements at each organization. At present, some of the best known implementations are:
-
Single-SPA Framework: This framework allows for the implementation of micro-frontends by combining other frameworks (React, Angular, Vue, etc). This is the implementation that we use at Kushki; we will explain it in more detail below.
-
IFrames: They isolate micro applications in iframes by using Window.postMessage APIs to coordinate multiple frames. IFrames share APIs exposed by the parent window.
-
Web Components: Front-end applications only deal with routing; they make decisions about the set of components to be displayed, and the orchestration of events among different web components.
Monolithic SPA versus Micro-Frontends
For Kushki's case, we will analyze the example of an application built with the purpose of allowing our customers to edit and view a variety of configurations available in our payment system, among other actions. This application was originally built as an SPA monolithic structure created in Angular 5. The application grew so much that, at some point, it contained more than 200,000 lines of code and about 13 rather complex components. All this resulted in an application that gradually became very difficult to maintain, and operating different features at the same time was an issue.
For this reason, we decided to change to micro-Frontends, in order to continue the development of this application. Several alternatives were analyzed, but the most mature alternative, with the best documentation, then and now, is the Single-SPA framework. In the beginning, we chose to migrate of the application while maintaining the framework with which the SPA monolithic structure was made (Angular).
In a first version of the new micro-frontend, it was decided that each of the original application components would become a micro-frontend. But, one of the difficulties that we found with this first version was the navigation bar, which had to be shared by all applications. Because of this, we decided to create an Angular library, which was installed in each micro-frontend. In this way, the first version of our first application with micro-frontends was released. It had the following structure:

Over time, we realized that our first idea, converting the navigation bar into an Angular library that has to be installed at each of our micro-frontends and updated for each application every time a change was made in the navigation, was not practical, and limited us to use only Angular for the development of our micro-frontends.
A Single-SPA framework requires the use of an index.html file, where all micro-frontends that are to be used by the application are registered. This file is called a root config file within the framework, and it usually contains a single HTML file where some framework methods are used to ensure that everything works correctly.
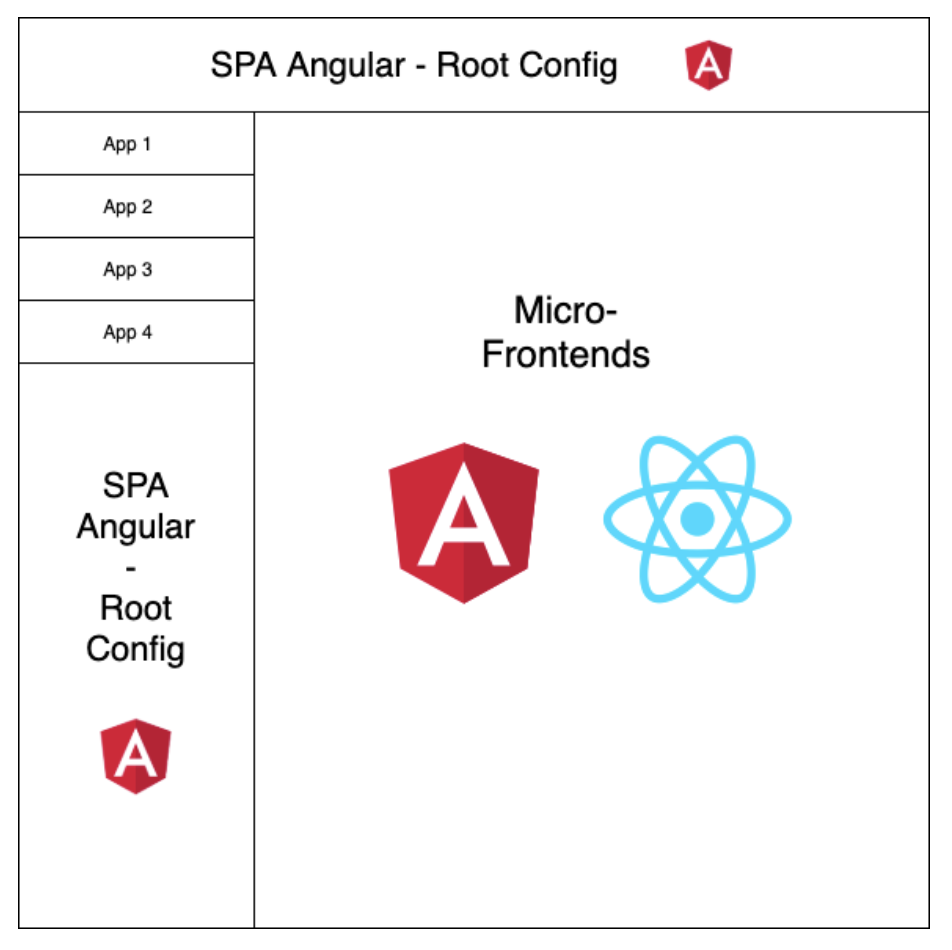
Then, to solve the problem of our navigation bar at Kushki, we decided that our framework root config file would not be a single HTML file, but rather a SPA built in Angular. We migrated all the logic that we had in the library to this one and configured the index.html library that Angular generates, to ensure that it works correctly with the configurations required by the framework (all this will be explained in more detail through an example below).
With this change, we managed to start developing micro-frontends, not only in Angular, but also in React. As a result, the original structure changed a little, and was established as follows:
When we abandoned our SPA monolithic structure and started using micro-frontends in our application, we managed to separate the multiple features we had in one place and optimized the introduction of new functionalities.
However, this does not mean that micro-frontends can be used for any project. For the vast majority of cases, a SPA monolithic structure is probably more than enough. A micro-frontends architecture is more suitable for large applications that group many functionalities. In Kushki, the vast majority of our SPAs are still monolithic structures, because they are not so big. This is why implementing this architecture must be considered only if a project is expected to have scalability problems over the medium- to long-term.
An Example of Micro-Frontends using a Single-SPA Framework
For this example, we are going to create a root application in React, where 2 applications created using a Single-SPA framework will be registered: one with Angular and one with React.
Part 1: Create a Root Config. Application
For the root application, only a web application created using create-react-app is needed. For this example, we are going to use npm as a javascript package administrator, and Typescript because it offers multiple benefits and it is now supported by React.
npx create-react-app root-config-app --template typescript --use-npm
Once our application has been created, we have to add single-spa to our project to be able to register our micro-frontends and browse through them.
npm i single-spa
The next step is editing the index.html file of the project to add the necessary scripts and imports to make our application work. Our file should look as follows:
<!DOCTYPE html>
<html lang="en">

  <head>
    <meta charset="utf-8" />
    <link rel="icon" href="%PUBLIC_URL%/favicon.ico" />
    <meta name="viewport" content="width=device-width, initial-scale=1" />
    <meta name="theme-color" content="#000000" />
    <meta name="description" content="Web site created using create-react-app" />
    <link rel="apple-touch-icon" href="%PUBLIC_URL%/logo192.png" />
    <!--
        manifest.json provides metadata used when your web app is installed on a
        user's mobile device or desktop. See https://developers.google.com/web/fundamentals/web-app-manifest/
      -->
    <link rel="manifest" href="%PUBLIC_URL%/manifest.json" />
    <!--
        Notice the use of %PUBLIC_URL% in the tags above.
        It will be replaced with the URL of the `public` folder during the build.
        Only files inside the `public` folder can be referenced from the HTML.

        Unlike "/favicon.ico" or "favicon.ico", "%PUBLIC_URL%/favicon.ico" will
        work correctly both with client-side routing and a non-root public URL.
        Learn how to configure a non-root public URL by running `npm run build`.
      -->
    <title>React App</title>
    <meta name="importmap-type" content="systemjs-importmap">
    <script type="systemjs-importmap">
        {
          "imports": {
            "@single-spa-test/app-angular": "http://localhost:4200/main.js",
            "@single-spa-test/app-react": "http://localhost:8080/app-react.js"
          }
        }
    </script>
    <script type="systemjs-importmap"
      src="https://storage.googleapis.com/react.microfrontends.app/importmap.json"></script>
    <script src="https://cdn.jsdelivr.net/npm/systemjs@6.2.5/dist/system.min.js"></script>
    <script src="https://cdn.jsdelivr.net/npm/systemjs@6.2.5/dist/extras/amd.min.js"></script>
    <script src="https://cdn.jsdelivr.net/npm/systemjs@6.2.5/dist/extras/named-exports.min.js"></script>
    <script src="https://cdn.jsdelivr.net/npm/systemjs@6.2.5/dist/extras/named-register.min.js"></script>
    <script src="https://cdn.jsdelivr.net/npm/import-map-overrides/dist/import-map-overrides.js"></script>
    <script src="https://unpkg.com/zone.js"></script>
  </head>

  <body>
    <noscript>You need to enable JavaScript to run this app.</noscript>
    <div id="root"></div>
    <!--
        This HTML file is a template.
        If you open it directly in the browser, you will see an empty page.

        You can add webfonts, meta tags, or analytics to this file.
        The build step will place the bundled scripts into the <body> tag.

        To begin the development, run `npm start` or `yarn start`.
        To create a production bundle, use `npm run build` or `yarn build`.
      -->
  </body>

</html>
To avoid adding unnecessary CSS to our brief example, we are going to add Material IU to our project and add a quick navigation example.
npm i @material-ui/core
We add a new Nav component to our project, where we will copy the navigation example.
import React from 'react';
import { createStyles, Theme, makeStyles } from '@material-ui/core/styles';
import Drawer from '@material-ui/core/Drawer';
import AppBar from '@material-ui/core/AppBar';
import CssBaseline from '@material-ui/core/CssBaseline';
import Toolbar from '@material-ui/core/Toolbar';
import List from '@material-ui/core/List';
import Typography from '@material-ui/core/Typography';
import ListItem from '@material-ui/core/ListItem';
import ListItemText from '@material-ui/core/ListItemText';

const drawerWidth = 240;

const useStyles = makeStyles((theme: Theme) =>
  createStyles({
    root: {
      display: 'flex',
    },
    appBar: {
      zIndex: theme.zIndex.drawer + 1,
    },
    drawer: {
      width: drawerWidth,
      flexShrink: 0,
    },
    drawerPaper: {
      width: drawerWidth,
    },
    drawerContainer: {
      overflow: 'auto',
    },
    content: {
      flexGrow: 1,
      padding: theme.spacing(3),
    },
  }),
);

export default function ClippedDrawer() {
  const classes = useStyles();

  return (
    <div className={classes.root}>
      <CssBaseline />
      <AppBar position="fixed" className={classes.appBar}>
        <Toolbar>
          <Typography variant="h6" noWrap>
            Single-SPA Root Config
          </Typography>
        </Toolbar>
      </AppBar>
      <Drawer
        className={classes.drawer}
        variant="permanent"
        classes={{
          paper: classes.drawerPaper,
        }}
      >
        <Toolbar />
        <div className={classes.drawerContainer}>
          <List>
            <ListItem button>
              <ListItemText primary="App Angular" />
            </ListItem>
            <ListItem button>
              <ListItemText primary="App React" />
            </ListItem>
          </List>
        </div>
      </Drawer>
      <main className={classes.content}>
        <Toolbar />
        <div id="single-spa-application:app-angular"></div>
        <div id="single-spa-application:app-react"></div>
      </main>
    </div>
  );
}
We edit the App.tsx file to include our new component. It should look as follows:
import React from 'react';
import Nav from './Nav';

function App() {
  return (
    <React.Fragment>
      <Nav />
    </React.Fragment>
  );
}

export default App;
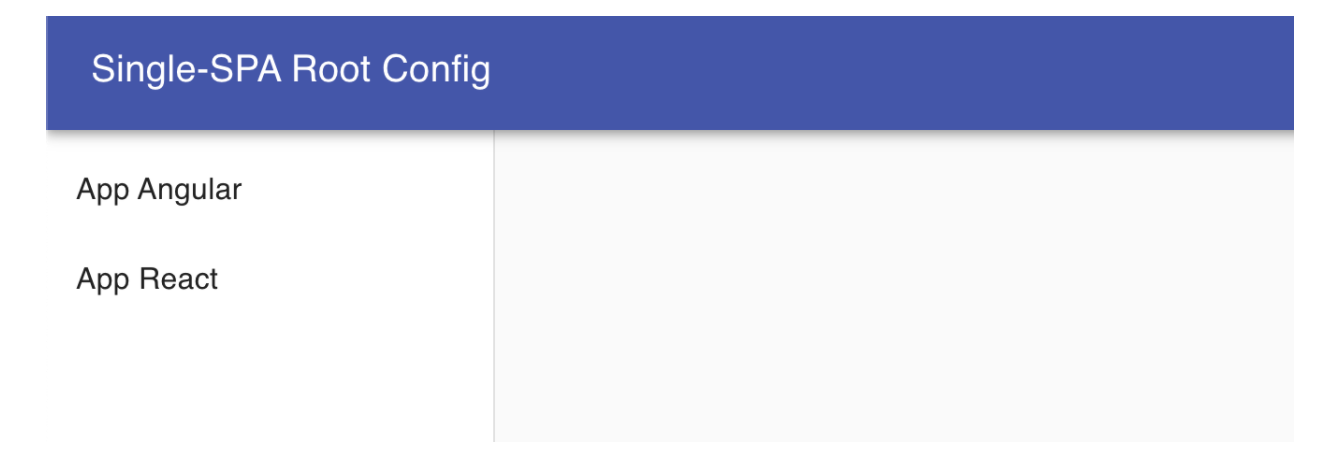
Once we have has done all this, we obtain a application as the following:
Part 2: Creating Single-SPA Micro-frontends
Angular
To create an Angular application using single-SPA, we'll simply create an SPA using the CLI provided by the framework. It is important to create the application using an Angular router, so that the micro-frontend works correctly.
ng new app-angular
Once the application has been created, we have to install the Single-SPA framework in our project. To do this, we must follow the instructions that we find in the framework documentation.
ng add single-spa-angular
This command automatically configures the framework in our application. We also have the possibility of installing manually (you can find the details in the documentation mentioned above).
Finally, we will create a simple component that we are going to show in this application and configure the routes that will be used by this SPA.
ng g c angular
In the route file, a main route must be configured, which must coincide with the route that is registered in the single-spa of the root config. It is also important to configure the Routing Module providers. The file should be configured as follows:
import { NgModule } from '@angular/core';
import { Routes, RouterModule } from '@angular/router';
import { APP_BASE_HREF } from "@angular/common";
import { AngularComponent } from './angular/angular.component';

const routes: Routes = [
  {
    path: "angular",
    component: AngularComponent,
  }
];

@NgModule({
  imports: [RouterModule.forRoot(routes)],
  exports: [RouterModule],
  providers: [{ provide: APP_BASE_HREF, useValue: "/" }]
})
export class AppRoutingModule { }
That is all that we have to do when creating a micro-frontend using this framework. Once you've followed these simple steps, you'll be able to edit your Angular application as you wish.
React
To create a micro-frontend using React it is necessary to use the manager provided by the Single-SPA framework (create-single-spa). We should enter React when when the manager asks which framework to use.
npx create-single-spa
And, with React, this is all we have to configure.
Part 3: Register Micro-Frontends using Single-SPA
Once we've created the micro-frontends, we have to register them in the root config application that we created in Part 1. To do this, we must edit the index.tsx file as follows:
import React from 'react';
import ReactDOM from 'react-dom';
import App from './App';
import { LifeCycles, registerApplication, start } from "single-spa";

ReactDOM.render(
  <React.StrictMode>
    <App />
  </React.StrictMode>,
  document.getElementById('root')
);

registerApplication({
  name: "app-angular",
  app: (): Promise<LifeCycles> => (window as any).System.import("http://localhost:4200/main.js"),
  activeWhen: "/angular"
});

registerApplication({
  name: "app-react",
  app: (): Promise<LifeCycles> => (window as any).System.import("@single-spa-test/app-react"),
  activeWhen: "/react"
});

start();
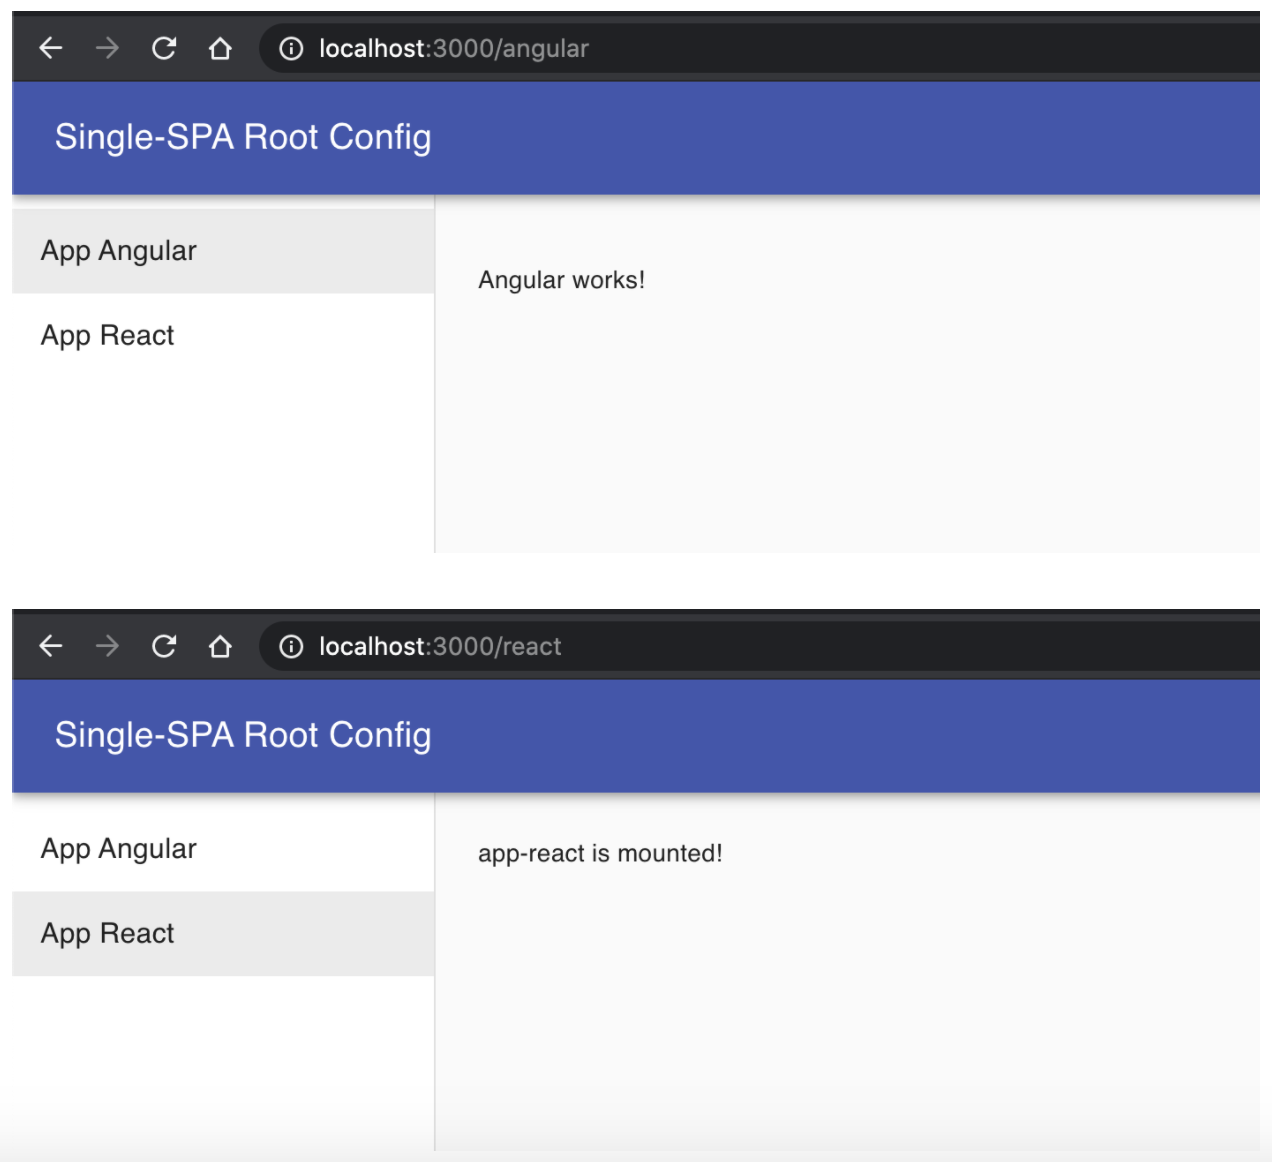
To be able to execute this example, you must run the following commands:
npm start # root config app
npm run serve:single-spa # angular app
npm start # react app
With all the applications running, we will have a completely functional micro-frontends example, developed in different frameworks, and in very few steps.
You can find the full code of the example we explained in this article in the following repository:
Micro frontends single spa example